Shotstack has partnered with Mux, the developer video platform that takes the complexity out of live and on-demand video. Developers can now integrate their video applications with Mux using Shotstack's destinations feature. By enabling the Mux destination, rendered videos are immediately sent to Mux when they are ready.
Thousands of publishers including Robinhood, PBS, Paramount, Equinox+, and VSCO rely on Mux to deliver the highest quality video experience without having to hire a team of embedded video experts. We're excited about the partnership and look forward to onboarding customers and integrating more Mux features in the future.
How to integrate Mux into your video application
To send your rendered videos to Mux, you will first need to set up a Mux account and generate credentials. Credentials are provided as a key ID and a secret key. Each environment in Mux has it's own credentials. You will most likely want to set up development and production keys. These can be paired with Shotstack's developer sandbox and production environments.
Generating credentials for Mux
To generate a key, first register or log in to Mux. Once you have logged in follow the instructions to generate a key. If you have already set up keys then you can find your keys under Settings > API Access Tokens. Your Mux keys will be needed in the next step.
Adding credentials to Shotstack
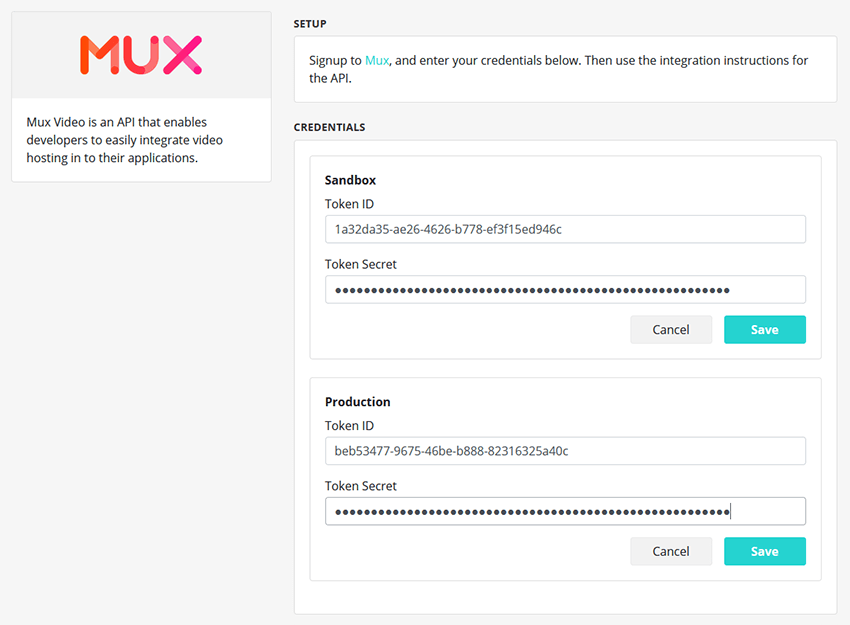
Mux credentials need to be saved in the Shotstack dashboard for each environment (sandbox and v1). Open the dashboard, visit the integrations page and choose the Mux destination. Enter the key id and secret for each environment as shown below.
 Add credentials for staging sandbox and v1 production environments.
Integrating the Mux destination with your application
To start sending rendered videos to Mux, add the destinations parameter to your request and include the mux provider.
If you are using JSON directly you can add the Mux destination to the output using the following:
"destinations": [
    {
        "provider": "mux"
    }
]
The complete output would look similar to below:
"output": {
    "format": "mp4",
    "resolution": "hd",
    "destinations": [
        {
            "provider": "mux",
        }
    ]
}
You can also set the playback policy to public, signed or both. The JSON below shows how to set the provider to signed. The default is public and can be omitted.
"destinations": [
    {
        "provider": "mux",
        "options": {
            "playbackPolicy": ["signed"]
        }
    }
]
The above configuration still sends the video to Shotstack's hosting service so you might want to skip that and only use Mux. The following JSON excludes Shotstack hosting and only sends videos to Mux:
"destinations": [
    {
        "provider": "mux",
        "options": {
            "playbackPolicy": ["signed"]
        }
    },
    {
        "provider": "shotstack",
        "exclude": true
    }
]
Integrating Mux using PHP, Node.js, Python and Ruby
Instead of working with JSON directly, you can also use one of the Shotstack SDK's. The example below shows how you would set the output and destination using the PHP SDK with playback policy set to signed:
$destinationOptions = new MuxDestinationOptions();
$destinationOptions->setPlaybackPolicy(['signed']);

$destination = new MuxDestination();
$destination->setOptions($destinationOptions);

$output = new Output();
$output
    ->setFormat('mp4')
    ->setResolution('hd')
    ->setDestinations([
        $destination
    ]);
The same code using the Node.js SDK:
const destinationOptions = new Shotstack.MuxDestinationOptions();
destinationOptions->setPlaybackPolicy(['signed']);

const destination = new Shotstack.ShotstackDestination;
destination.setOptions(destinationOptions);

const output = new Shotstack.Output;
output
    .setFormat('mp4')
    .setResolution('hd')
    .setDestinations([
        destination
    ]);
The same result can be achieved using Ruby and Python.
We are looking at adding more destinations to other 3rd party services over the coming months. If there is a hosting provider, social network or storage provider you want us to add reach out to us via the community forum.

Become an Automated Video Editing Pro
Every month we share articles like this one to keep you up to speed with automated video editing.


